No pressure: The ultimate guide to installing PRVs

Ensuring that water pressure is safe for end users is one of the most important factors of any plumbing and heating system. Whilst a low water pressure comes with its own list of problems, a high water-pressure is far more dangerous and detrimental to the plumbing system, as well as the end user in the short term. Regardless of the property type, safe water pressure can increase the longevity of a plumbing and heating system and make the water safer to use overall. This is why it is extremely important to fit pressure reducing valves (PRVs) where necessary to reduce the harmful effects of a high (and low) water-pressure.
To help we have created our ultimate guide to installing PRVs.
What does a PRV do?
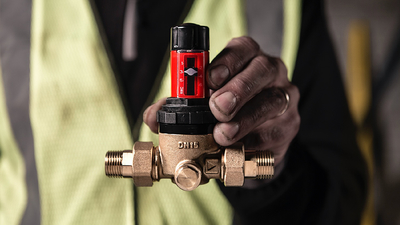
Before installing PRVs you need to understand what they are. A pressure reducing valve (PRV), such as the Predator Pressure Reducing Valve from Reliance Valves, functions by reducing a high inlet pressure at the inlet to a safer, lower water pressure at the outlet. The benefits of PRVs are multiple, as safe water pressure can decrease the amount of damage to plumbing and heating systems, appliances, and ultimately, buildings. Considering water pressure in the UK can vary from 1 bar to 20 bar, it is important that any risk to plumbing and heating systems is minimised to keep buildings and people safe.
Furthermore, PRVs ensure that the flow rate of water is not only fit for purpose but that there is a safe water pressure that will allow other valves, such as thermostatic mixing valves, to function correctly as well.

Sizing PRVs correctly
The first step in our guide to installing PRVs is to know what size PRV you need. This is because it is important to correctly size a PRV to suit the flow rate of the water passing through it and not all PRVs are able to fit every size required.
PRVs are sized on a nominal diameter, which means the diameter at the middle point of the pipe thickness. It’s against best practice to match the PRV to the inlet pipe size, as this can often lead to over-sizing, which has adverse effects on the system such as causing undesired noise and also damaging the PRV seal.
Equally, this means the PRV will not be ‘drop tight’ and would allow the downstream pressure to ‘creep’. Instead, the PRV should be sized based on the demand required, at the agreed set system pressure. This ensures reliable pressure control and that the valve is working within its optimum parameters.
As undesirable as an oversized valve is, an undersized valve is just as inefficient, as it can become very noisy every time outlets are opened and shut. This is because of the large volume of water squeezing through the valve, which causes the internal spring to vibrate under strain, and can create a ‘water hammer’ effect in the pipework.
Reducing pressure at every stage
Due to the high inlet pressures required of commercial building such as apartment blocks, hospitals and shopping centres, only having one PRV is often not enough for these types of buildings to remain safe. This is where the practice of PRV staging can, and should, be implemented.
A PRV can only safely reduce the water pressure so much. If a PRV has an operating ratio of 3:1, it could only reduce an inlet pressure of 12 bar to 4 bar.
If too much demand is placed on the PRV, it has an increased risk of cavitation and damage to the valve. This is why we stage PRVs in certain buildings.
When staging PRVs, the water pressure is gradually reduced via the use of 2 or 3 PRVs rather than just the one. We include this in our guide to installing PRVs as it is not only best practice to prevent damage to the PRVs and plumbing and heating system as a whole, but it also creates a second layer of protection in the event of any failures or complications in the system.
A PRV for every project
When choosing the correct PRV, it is always important to consider four key factors:
- Whether the PRV is being installed in a domestic, commercial, public, or industrial building.
- The required outlet pressure range.
- The flow velocity.
- The flow rate required for that building – this is measured in litres per minute (lpm) and is the volume of water needed to flow through the outlet to operate effectively.
The flow rate is going to affect what size PRV you need, as the maximum flow rate increases as the size of the PRV increases. For example, a PRV with a DN of 15 has a maximum flow rate of 30 lpm, and a PRV with a DN of 250 has a maximum flow rate of 4500 lpm.
For example, for domestic use, the 312 Compact Series PRV from Reliance Valves is a perfect option. This PRV can adjust to pressures between 1.5 and 6.0 bar and the compact design makes for a quick and easy installation and test.

Need Technical Support?
Our guide to installing PRVs should help cover the basics but if you are unsure about what PRV should be used for your project, or require any other installation advice, RWC’s team of technical experts are on hand to provide technical information and advice on installation best practice for plumbing and heating applications. If you’ve got any questions, please contact us.
